Showing posts with label Mr. WonkyFace. Show all posts

Saturday, October 30, 2010

tutorial: how to make an 8-bit video game character costume, pt. 2

 Continued from Part 1
 Step 5
Now it's time to put the eyes and mouth on your ghost.  Cut pieces of paper to the appropriate size and shape and glue them on your ghost.  I wanted to create some depth and decided to glue the paper to pieces of cardboard and THEN mount them on the ghost.  You don't have to do this additional step if you don't want to.
Your acrylic ruler truly is your friend.  Use it to align the eyes and mouth pieces on your board.

Step 6
My original Pac-Man ghost costume wasn't wearable.  I created handles by taping toilet paper tubes to the back.  You can certainly do this if you want.  But this Halloween I wanted my costume to be hands-free.
This is where your extra binding will come in handy.
You can use them as straps!  This also means that you will have to create two Pac-Man ghosts.  In this case the front is a regular ghost and the back is the ghost after Pac-Man eats a power pellet.

I hope you enjoyed my little tutorial.  I certainly enjoyed writing it.

HAPPY HALLOWEEN!

Wednesday, October 27, 2010

tutorial: how to make an 8-bit video game character costume, pt. 1


My boyfriend and I spent this past weekend finishing up our Pac-Man ghost costumes for Halloween.  I made this tutorial so you can make your own costumes.  I tried my best to be as through as possible without being too detailed. I hope you enjoy it.  Let's get started!

Step One
The first thing you want to do is find your character at The Spriters Resource.  Just right click on the image and select copy.  Open up MS Paint and paste your image.  Now zoom in 800% so you can easily see each individual pixel.  Also select "Show Grid". 

You can choose to print out the blown-up image or draw it on graph paper.  Now you need to decide the size of your finished costume.  I wanted our costumes to be fairly large, between 25-30 in. sq.  So I chose to represent each pixel as two inches.

Step Two
Gather your supplies.  You'll need the following:
- 1 big-ass piece of cardboard
- Spray paint, glossy preferred
- Box cutter
- Clear acrylic ruler (a quilter's best friend)
- Newspaper
- Masking tape
- Twine, string or left over binding to use as straps
- Glue

The big-ass piece of cardboard can be found at Costco or other warehouse club stores.  Don't forget to inspect your cardboard for indentations or other blemishes.  You want one that's in pristine condition.  Another thing, the big-ass piece of cardboard is free.

Step Three
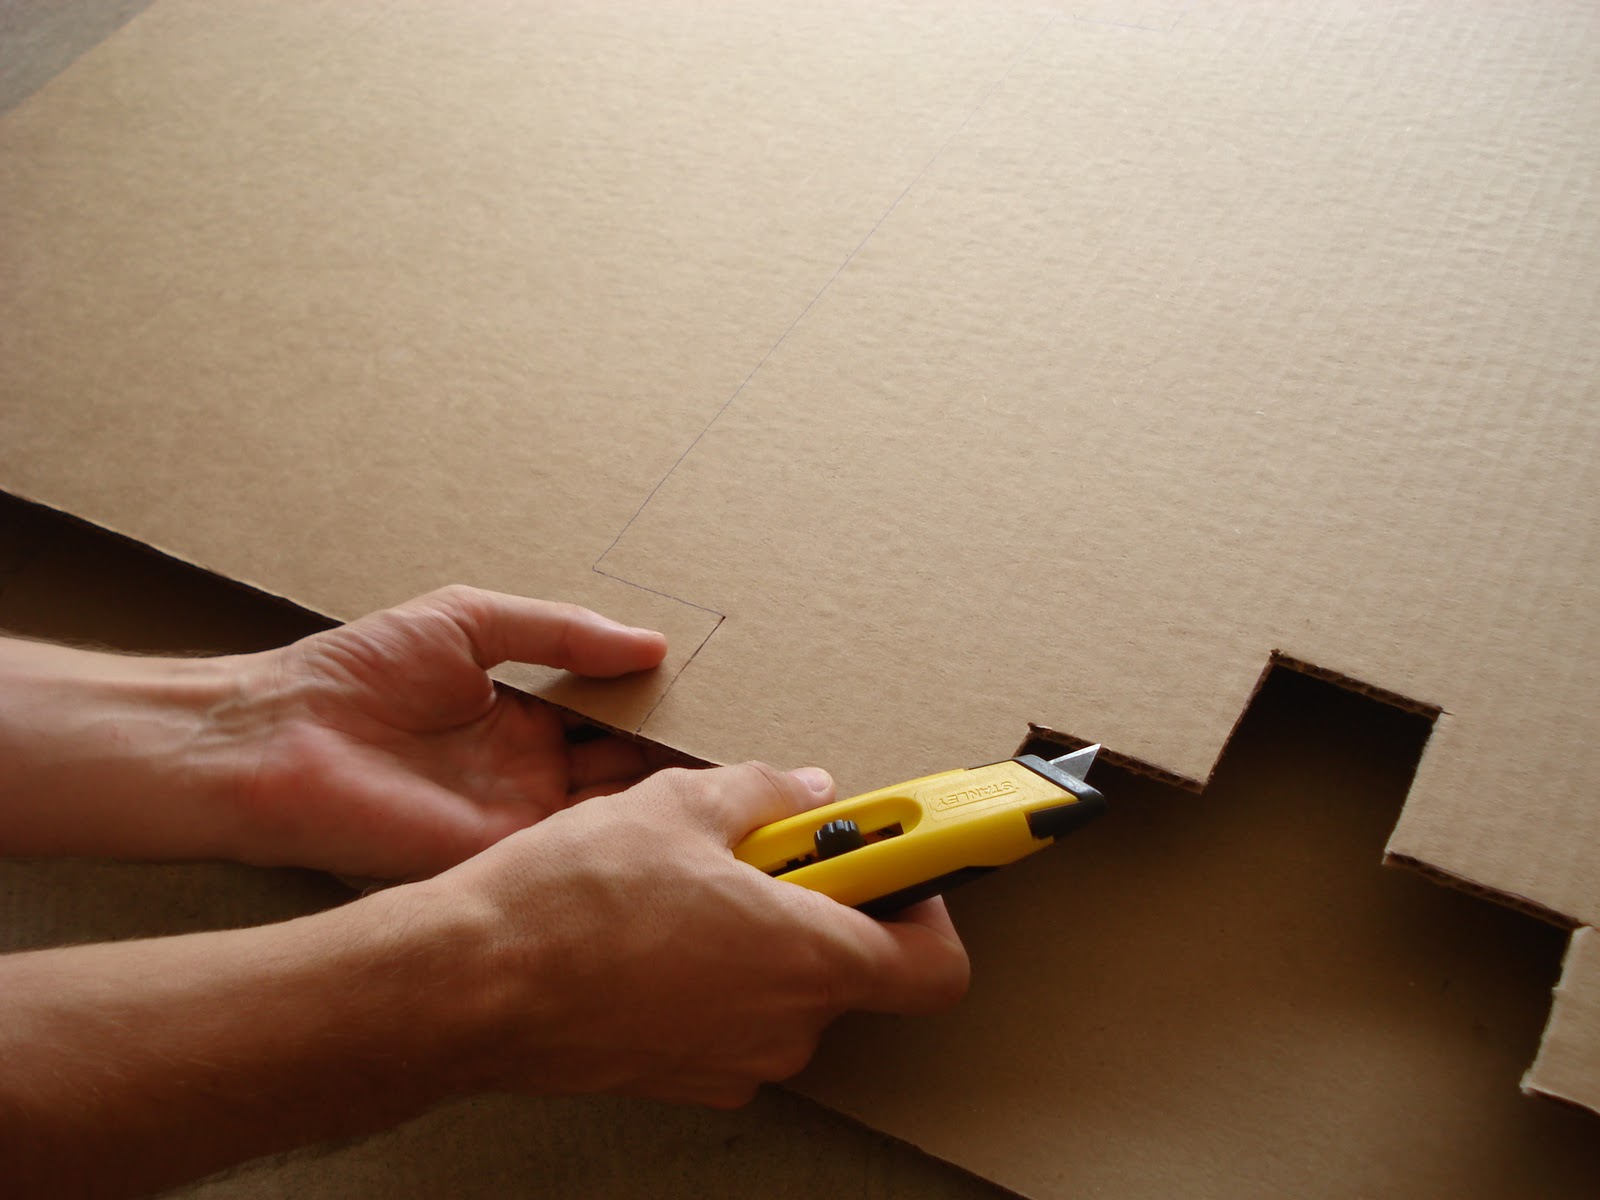
Cut your big-ass piece of cardboard into the desired shape.
Start by tracing your image on the cardboard with a pen.  I recommend starting at the edges because it'll help reduce the amount of cutting you'll need to do. 
 Before you start cutting you need to place something underneath your cardboard so you don't scratch up your lovely floor.

Step four
Put down some newspaper and start painting.
My boyfriend's technique involved spraying back and forth across the cardboard starting from the top and working his way to the bottom.
Let it dry for fifteen minutes and apply another coat.  Do three coats total.
Don't forget to do Sunday's Sudoku while you're waiting for the paint to dry.

To be continued...

Monday, July 26, 2010

Stripy binding

This weekend I learned why I should never leave my camera unattended when my boyfriend's over:
Oh dear.

Anyway, in non boyfriend related news, today I made some stripy binding for my Little Red Hen quilt.

Monday, July 19, 2010

Whew


The Zig Zag quilt is finally done and ready to be shipped to my boyfriend's mother in South Dakota.  I don't have a lot to say about this quilt that hasn't already been said in previous posts.  I'm satisfied with how it turned out and I wouldn't change a single detail. 

My boyfriend just purchased a Cannon SLR and was kind enough to snap a few pics of my quilt.

He let me take a few too.

Friday, July 2, 2010

Happy Birthday, Nick!

Today is my boyfriend's 29th Birthday.  Last year I made him a couple of Super Mario themed pillows.
He really liked them.  This year I didn't have time to make him anything and I regret not planning earlier in advance. 

Anyway, my boyfriend is awesome and here's why:
  • His asymmetric face inspired the name of this blog
  • He provides me with comfort and love
  • He loves me like no other man has before
  • He rides a motorcycle and plays guitar
  • He tolerates my weirdness
And the best part?
 He's incredibly sexy.

I love you, Nick.