Saturday, October 30, 2010

tutorial: how to make an 8-bit video game character costume, pt. 2

 Continued from Part 1
 Step 5
Now it's time to put the eyes and mouth on your ghost.  Cut pieces of paper to the appropriate size and shape and glue them on your ghost.  I wanted to create some depth and decided to glue the paper to pieces of cardboard and THEN mount them on the ghost.  You don't have to do this additional step if you don't want to.
Your acrylic ruler truly is your friend.  Use it to align the eyes and mouth pieces on your board.

Step 6
My original Pac-Man ghost costume wasn't wearable.  I created handles by taping toilet paper tubes to the back.  You can certainly do this if you want.  But this Halloween I wanted my costume to be hands-free.
This is where your extra binding will come in handy.
You can use them as straps!  This also means that you will have to create two Pac-Man ghosts.  In this case the front is a regular ghost and the back is the ghost after Pac-Man eats a power pellet.

I hope you enjoyed my little tutorial.  I certainly enjoyed writing it.

HAPPY HALLOWEEN!

Wednesday, October 27, 2010

tutorial: how to make an 8-bit video game character costume, pt. 1


My boyfriend and I spent this past weekend finishing up our Pac-Man ghost costumes for Halloween.  I made this tutorial so you can make your own costumes.  I tried my best to be as through as possible without being too detailed. I hope you enjoy it.  Let's get started!

Step One
The first thing you want to do is find your character at The Spriters Resource.  Just right click on the image and select copy.  Open up MS Paint and paste your image.  Now zoom in 800% so you can easily see each individual pixel.  Also select "Show Grid". 

You can choose to print out the blown-up image or draw it on graph paper.  Now you need to decide the size of your finished costume.  I wanted our costumes to be fairly large, between 25-30 in. sq.  So I chose to represent each pixel as two inches.

Step Two
Gather your supplies.  You'll need the following:
- 1 big-ass piece of cardboard
- Spray paint, glossy preferred
- Box cutter
- Clear acrylic ruler (a quilter's best friend)
- Newspaper
- Masking tape
- Twine, string or left over binding to use as straps
- Glue

The big-ass piece of cardboard can be found at Costco or other warehouse club stores.  Don't forget to inspect your cardboard for indentations or other blemishes.  You want one that's in pristine condition.  Another thing, the big-ass piece of cardboard is free.

Step Three
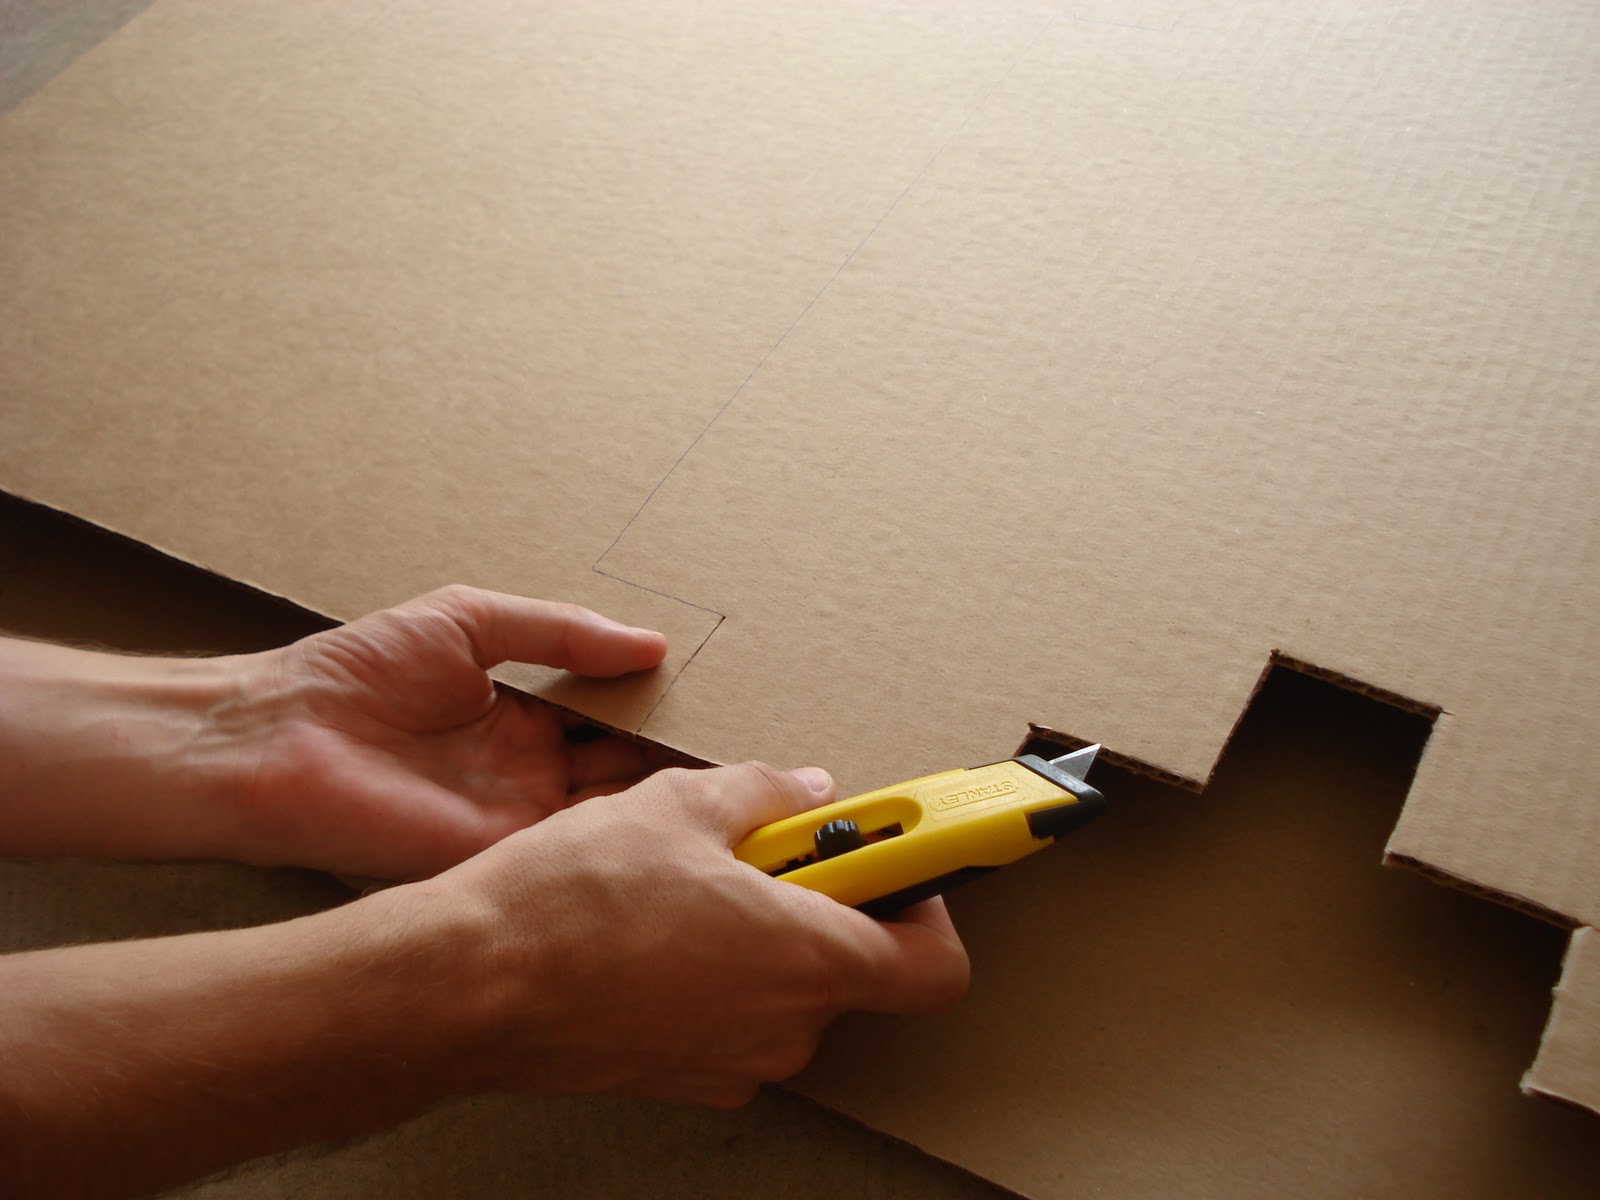
Cut your big-ass piece of cardboard into the desired shape.
Start by tracing your image on the cardboard with a pen.  I recommend starting at the edges because it'll help reduce the amount of cutting you'll need to do. 
 Before you start cutting you need to place something underneath your cardboard so you don't scratch up your lovely floor.

Step four
Put down some newspaper and start painting.
My boyfriend's technique involved spraying back and forth across the cardboard starting from the top and working his way to the bottom.
Let it dry for fifteen minutes and apply another coat.  Do three coats total.
Don't forget to do Sunday's Sudoku while you're waiting for the paint to dry.

To be continued...

Tuesday, October 26, 2010

new project!

It looks like I'm going to be busy this week.  ; ) 

Oh, and thanks again for the encouraging comments in my last post.  I'm going to keep on trucking.

Tuesday, October 19, 2010

time for doubts

"Meh" pretty much sums up how I feel about this quilt right now.  I know this feeling will pass, it always does.  But I essentially gave birth to this quilt and I feel like a bad mother for not loving it unconditionally.

Tuesday, October 12, 2010

g-g-g-g-g-ghosts!

I promised you guys a video game themed post by Monday and I didn't deliver.  Sorry.  But I hope what I have to show you makes up for it.
Zoinks!  It looks like my garage is invested with Pacman ghosts!
This is going to be the best Halloween ever!

P.S.  I plan to put up a tutorial this week sometime in the future so you can make your own ghosts.

Friday, October 8, 2010

good stuff

I literally did a double take when I saw these at Costco.
Yay!  Nintendo themed gummy candies!  I bought it a box on a whim, not caring about the actual quality of the product, because hey, it's Mario.  The risk was huge.  There was no way I would be able to consume 43 pouches of sub-par gummy candies by myself.
Fortunately, they turned out to be superior in both taste and appearance. 
Look at the detail!  Not only can I count individual fingers on Donkey Kong, I can also make out his collar and the knot in his tie.  They're also shiny and clear instead of dull and opaque like traditional gummy bears.  I also like that they didn't leave a sticky residue on my skin after mashing them between my fingers. 
I could go on and on about how much I love these little things.  I suggest that you try them out for yourself.  Even if you don't like gummy fruit flavored snacks,

it's still fun to decapitate beloved Nintendo characters!

P.S.  Expect another video game themed post on Monday.

Friday, October 1, 2010

parsley and coal

I started a new project last week. I'm going to turn these two stacks of fabric
into a quilt that resembles this crude sketch:
Here's what I've got so far:
That's all, folks!